An iPhone is a great integral screen recording feature that makes it simple for users to record videos of their screen activities. This feature offers multiple options for various needs such as creating tutorials, documenting procedures, sharing special moments, and troubleshooting technical issues. It is also perfect for personal, professional, and educational use because it can record both audio and visual content when activated through the Control Center. All skill levels can easily record, save, and share screen content straight from your iPhone.
Key Features of Screen Recording on an iPhone:
The smartphone market and society have been significantly influenced by the iPhone. An iPhone’s screen recording is flexible and practical. All these features of screen recording on an iPhone are valuable tool for various personal and commercial applications. There are some key features of screen recording on an iPhone that are as follows:
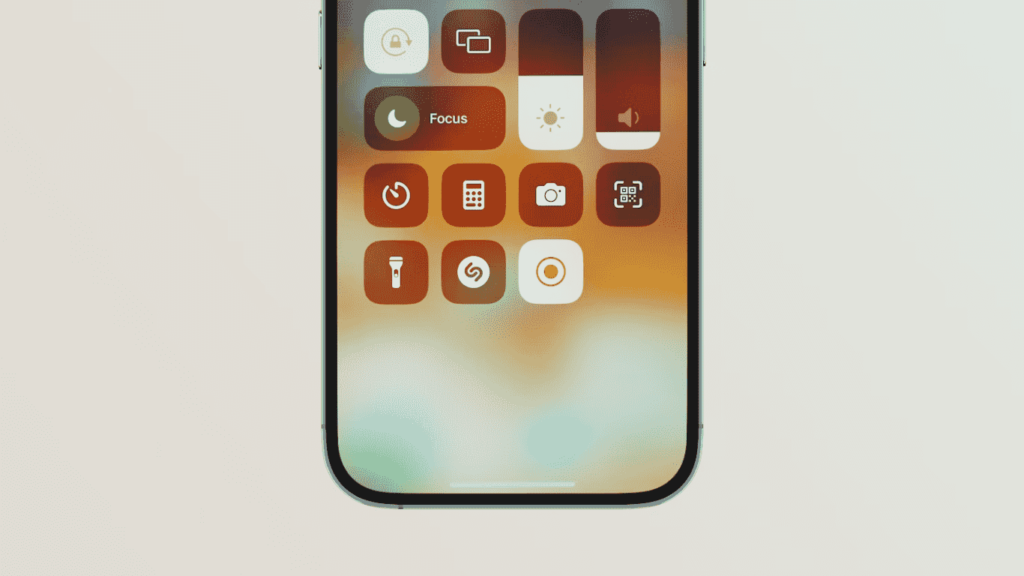
⦁ Screen recording is perfect for developing educational content. Educators can demonstrate to utilize apps, access software and complete specific activities. This visual help is especially beneficial for remote learning environments and giving students clear instruction step-by-step.
⦁ Screen recordings are a useful tool for businesses to provide instruction to new staff members. This method also facilitates the successful explanation of complicated processes, software usage, and corporate policies. The reuse of recorded training sessions can also be used for long-term time and resource savings.
⦁ Team members can record their screens to explain their problems. They show how projects are coming along. This type of visual communication is very helpful for remote teams. Because it makes sure everyone is in contact and working well.
⦁ Screen recording also enables all iPhone users to record significant events such as game high scores, accomplishments and priceless video chats with loved ones. Special memories can be preserved by simply sharing and saving these recordings.
⦁ Influencers and content creators can employ screen recording to produce interesting content for Tik Tok, Instagram, and YouTube. All app reviews, gameplays, lessons, and other unique videos that call for screen capture are included in this group.
⦁ Experts can document complicated processes by recording what they do. This helps ensure consistency in performing tasks and helps to create standard operating procedures (SOPs).
⦁ An iPhone 14 Pro max is made up of a surgical-grade stainless steel frame and a Ceramic Shield front cover.
⦁ 14 Pro Max is only available in Deep Purple, Gold, Silver, and Space Black colours.
⦁ Its display is 6.7 inches with a super Retina XDR display with ProMotion and always-on display.
⦁ An iPhone 14 Pro Max has an All-day battery life that is similar to the iPhone 13 Pro Max with MagSafe wireless charging and Lightning port.
⦁ Its primary camera is a 48MP main sensor, 12MP ultra-wide, 12MP telephoto with 3x optical zoom and the front camera has a 12MP TrueDepth.
iPhone 15 Pro Max:
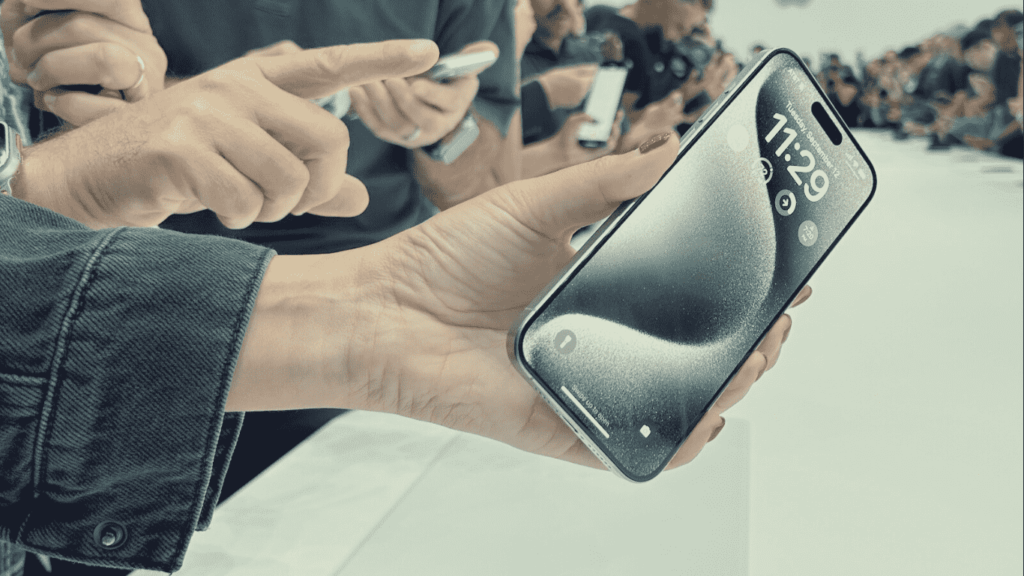
⦁ An iPhone 15 Pro max is made up of a titanium frame, ceramic shield front cover, and glass back.
⦁ It is available in Natural Titanium, Blue Titanium, White Titanium, and Black Titanium.
⦁ It’s weight and size are lighter and slightly thinner than the iPhone 14 Pro Max due to the titanium frame.
⦁ Its size is also 6.7 inches with a super retina XDR display with ProMotion and always-on display.
⦁ Its primary camera has a 48MP main sensor that has been enhanced for better low-light performance, along with a 12MP ultra-wide, 12MP telephoto, and 5x optical zoom. Its 12MP TrueDepth front camera also performs well in dim light.
Screen Recording on an iPhone 14 Pro Max:
Screen recording on the iPhone 14 Pro Max allows users to record screen content directly from their phone or devices. Screen recording is a built-in function of all iPhone models operating iOS 14 or later. It is possible on any iPhone model released after the iPhone 8 without the need for an additional app. There are a few steps to take screen recording on iPhone 14 Pro Max:
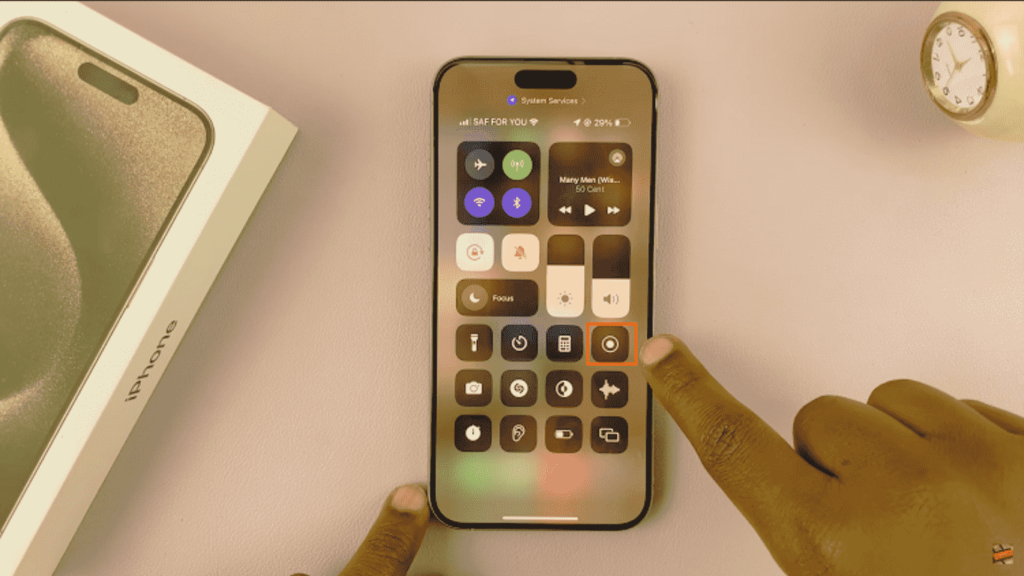
⦁ Open the Settings on your iPhone device.
⦁ Click “Control Center”.
⦁ Then, tap “Customize Controls”.
⦁ After adding it to the control settings scroll down and find screen recording.
⦁ Then, click the green plus (+) button next to the screen recording to add it to your control center.
⦁ Swipe down from the top-right corner of the screen to open the Control Center.
⦁ Then click the Screen Recording button.
⦁ After that, you’ll see a countdown (3 seconds) before the recording starts.
⦁ Then the status bar at the top of your screen will turn red. It indicates that the recording is in progress.
⦁ To finish the screen recording, swipe down from the top-right corner of the screen.
⦁ Click the red Screen Recording button.
⦁ Alternatively, click also on the red status bar at the top of your screen. Then, tap Stop in the confirmation dialogue.
⦁ Go to the Photos app on your iPhone to access your recording in the gallery.
⦁ Then you can watch your screen recording saved to your Photos library.
⦁ Look in the recent album or the Videos album.
Screen Recording on iPhone 14 Pro Max with Sound:
Screen recording and voice recording are the iPhone 14’s default setting. It’s most probably that the microphone’s default setting while screen recording is off if you’re having trouble recording audio from YouTube. This time, only the screen will be recorded no audio will be included. For screen recording to record sound, you must turn on the microphone in the settings. To record your iPhone 14 Pro Max screen with sound then follow these steps.
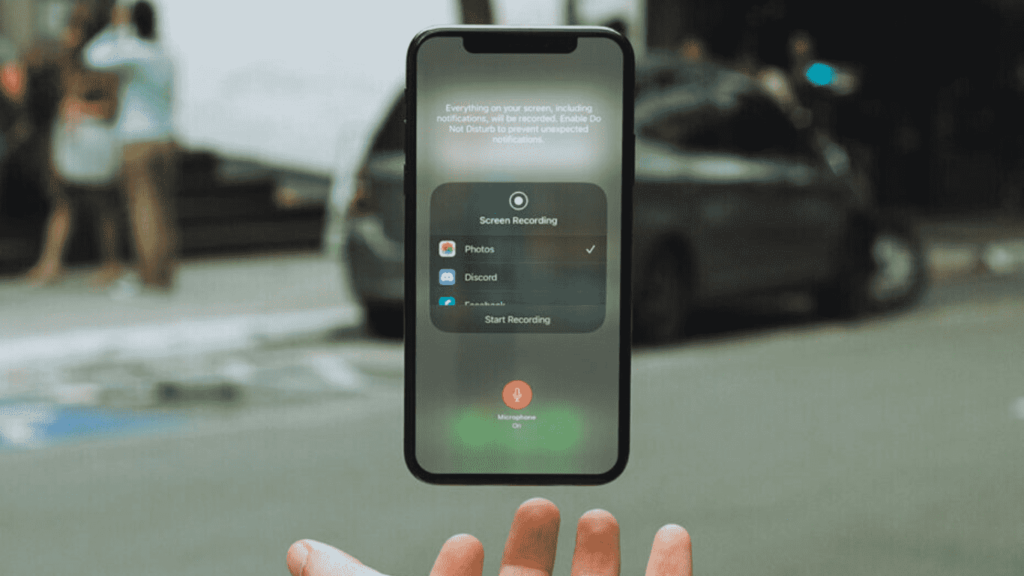
⦁ Press and hold the upper-right corner of your iPhone screen to show the “Control Center.”
⦁ Go to the icon for screen recording. Switch the “Screen Recording” icon on and off. A new menu with a microphone icon will appear as a result.
⦁ After that select the microphone icon to turn on the audio recording. Then, it will turn red.
⦁ Swipe up to close the Control Center.
Screen Recording on an iPhone 15 Pro max:
A lot of iPhone 15 users are trying to find a useful and efficient way to record the screen of their phone for things like tutorials, Skype chats, or videos. If not, you can add the screen recording button to the panel by following these instructions.
⦁ Open the Settings menu on your iPhone 15 to start the process then scroll down until you locate the “Control Center” option.
⦁ The screen that opens when you find and tap it will have two distinct sections One of them is “Included Controls” and the second one is “More Controls.”
⦁ Select “More Controls” and “Screen Recording” to start recording on the iPhone. In order to add it to the list of “Included Controls,” click the green “+” symbol.
⦁ Use the three horizontal lines to move it around in the “Included Controls” section after it has been inserted. You can assign it to any position by changing the arrows.
Now, whenever you need screen recording you can follow these steps.
⦁ Go to the Control Center.
⦁ Swiping down from the top right corner of your iPhone 15 will allow you to do this.
⦁ Then, search for the “Screen Recording” option that you had added in the previous stage.
⦁ Press the screen recording button. Then there will be a countdown of three seconds when you tap to get your screen recorder ready.
⦁ An iPhone 15 starts screen recording at zero countdown and starts capturing visible screen content. A large “Red” dot on the dynamic island indicates recording is visible in all applications.
⦁ Once the video has finished, press the “Red” indicator and select “Stop.” Your Photos app will automatically store the screen capture you took.
Using Siri to turn on screen recording on the iPhone 15 Pro Max:
It is assumed that you are efficient in using the initial approach to screen record on an iPhone 14 or 15. However, if you feel that it is a bit complicated, there is another simpler approach that you might think about. It is to use Siri to assist you with screen recording. You can follow these instructions for screen recording:
⦁ Siri can be activated by saying “Hey Siri” or pressing and holding the side or home button on iPhone X or later.
⦁ You can say “Record my screen” or “Start screen recording” after turning on Siri.
⦁ After that, your Siri will acknowledge that the screen recording has begun and show a red status bar at the top of the screen to show that it is currently running.
⦁ You can either ask Siri to “Stop screen recording” or you can hit the red button to end the process of screen recording.
⦁ You will save the recorded files to your Photos app after screen recording. When needed, you can view, update, or forward it from that location.
Conclusion:
Consequently, this article has covered two efficient ways to screen record on the iPhone 14 Pro Max and 15 Pro Max along with thorough instructions. It is thought that you have successfully grasped them, so go ahead and try! Additionally, it offers a powerful and ideal screen recorder.


1 Comment
Your website is a great resource. Keep up the excellent work!